| MacHouse Software |
Last updated: September 28, 2011
|
| QuickPaste - User's Guide |
1. Installing and uninstalling QuickPaste Please read the README file that comes with the application. Or click here to download one.
What is QuickPaste? QuickPaste allows the user to batch-watermark any number of graphic files with a graphic image, as opposed to text. In other words, it will let you place the same watermark layer on multiple images. First, drag and drop a background image onto the drop box as shown below. Then select and double-click on any of the watermark images on the sidebar that you have imported. Now, grab and freely move the selected watermark image and position it.
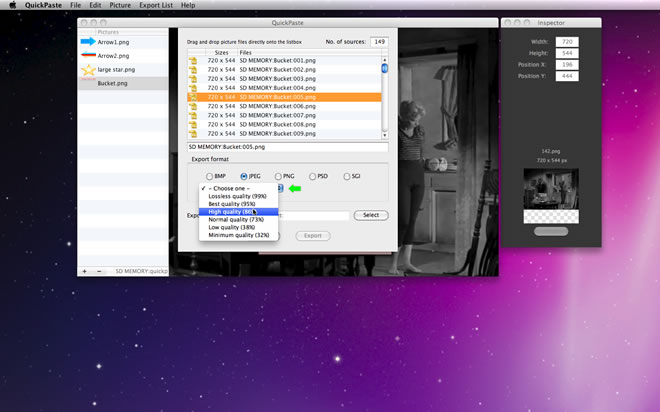
After positioning the watermark image, choose Export under File and get ready to import source graphic files on which to watermark. Finally, select a graphic format and click on Export. Got 100 files to watermark? No problem... It shouldn't take a minute to watermark them all.
When you first launch any new application, it's always a good idea for you to open Preferences. Okay, why not? In order to open Preferences, choose Preferences under QuickPaste. (See Screenshot 3-1.)
The first tab is Settings. And you don't have many settings to work on. (See Screenshot 3-2.) Enable Require restart if you want the application to automatically restart itself when you close Preferences window. By so doing, you can make sure your application is updated with the latest changes you've made in Preferences. Enable Confirm deletion if you want to be prompted for confirmation every time you attempt to delete a stored watermark picture. And enable Inspector follows Canvas if you want the Inspector window to follow the main window whenever you move it.
Moreover, let's take a look at what we have inside the box that is labeled Default open folder. If you want the application to point to a specific folder or volume whenever you need to select a file, click on the Select button. (See Screenshot 3-3.) By default, QuickPaste will automatically set the default open folder to Desktop. If your default open folder does not exist at the time of startup, QuickPaste will automatically set it back to Desktop as well. Next, let's switch to the Export tab. Under this tab, you can set your default export format. (See Screenshot 3-4.) You have five graphic formats (BMP, JPEG, PNG, PSD, SGI) to choose from. Choose one by exploring the drop-down menu under the label that says Export format. As for JPEG, you can choose one of the six compression rates from the second pull-down menu.
Under the same tab, find a box that says Default export folder. (See Screenshot 3-5.) Unlike Default open folder, which is supposed to point to a folder containg image files, Default export folder points to a destination folder where to export watermarked images.
The following is a list of simple steps.
As shown in Screenshot 4-1, QuickPaste consists of two windows. The main window has Sidebar and Canvas. Canvas is a graphic screen where you position a watermark layer. Sidebar lists watermark pictures you have imported to the application. Inspector has its separate window, whose main purpose is to show the position of the watermark picture. You can also quickly import a background image through its drop box.
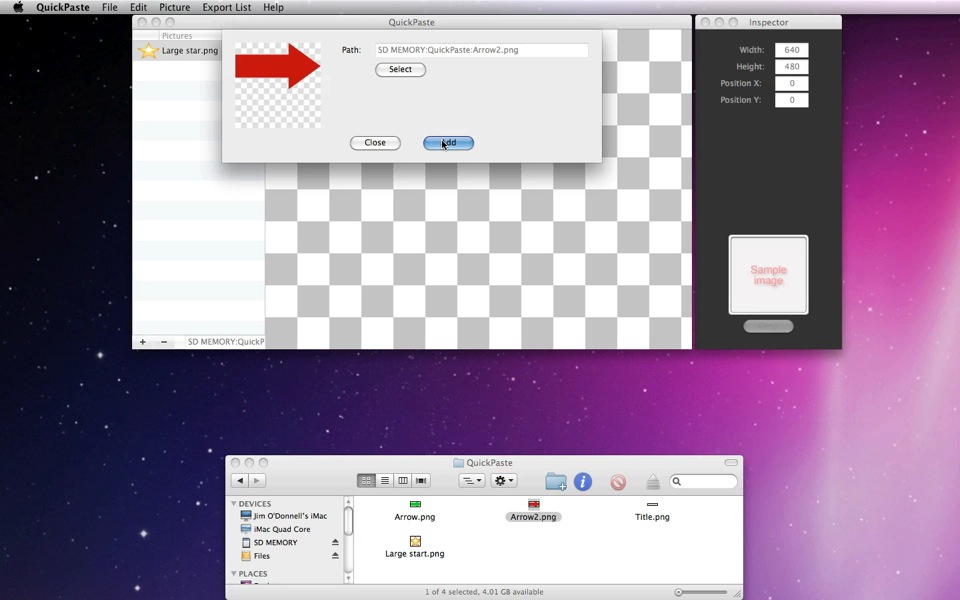
When you use QuickPaste, your first task may be to import watermark pictures. Click on the Add button at the bottom of the sidebar. (See Screenshot 4-2.)
Likewise, you can choose Add Picture under Picture instead of clicking on the Add button to import a watermark picture. (See Screenshot 4-4.) When you drag and drop a picture file onto the drop box, this drop box will turn itsself into a preview screen showing a resized image. Finally, click on the Add button to add the selected watermark picture to the sidebar. (See Screenshot 4-5.) Does QuickPaste store these files? Well, technically, it won't. QuickPaste only remembers paths to those saved watermark pictures.
Next, let's import a sample image. Simply, drag and drop an image file onto the drop box available at the bottom of the Inspector window. (See Screenshot 4-6.) When you import a sample image, QuickPaste will resize its main window automatically, displaying the entire picture of the selected sample image on Canvas. (See Screenshot 4-7.) So you cannot resize Canvas.
Earlier, we chose Add Picture under Picture to add watermark pictures to the sidebar. Next, let's choose Open Picture as shown in Screenshot 4-8 to see what happens. QuickPaste will open a select window that points to your default open folder, allowing you to select an image file. As shown Screenshot 4-9, it will place the selected image as a watermark picture without saving it to the sidebar.
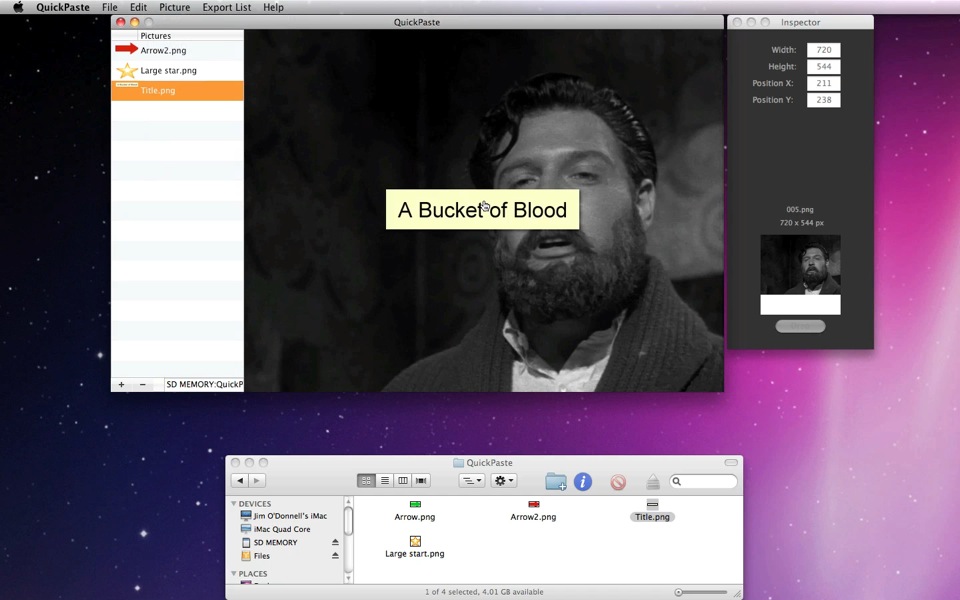
So how do you send any of the sidebar pictures to Canvas? First, select one. Then double-click on it. You can also choose Set Picture under Picture. And the selected picture will appear as a watermark picture on Canvas. (See Screenshot 4-11.)
If you want to remove any of the sidebar watermark pictures, first, select one on the sidebar. Then click on the Delete button at the bottom of the window. (See Screenshot 4-12.) If you have enabled 'Confirm deletion' in Preferences, you will be prompted for confirmation. Click on Yes to remove the selected picture from the sidebar.
Now, let's position the selected watermark picture. When the Mouse pointer nears the watermark layer, it will transform itself into a hand pointer. Hold down the Mouse button to grab the picture, and you can freely move it. If you want to place the watermark picture at the center of the sample image, choose Move To Center under Picture. (See Screenshot 4-13.) And QuickPaste will relocate the watermark picture accordingly. (See Screenshot 4-14.) Likewise, choose Move To Top Left, Move To Top Right, Move To Bottom Left, Move To Bottom Right to quickly reposition the watermark picture.
|