| MacHouse Software |
Last updated: May 15, 2011
|
| AppReady - User's Guide |
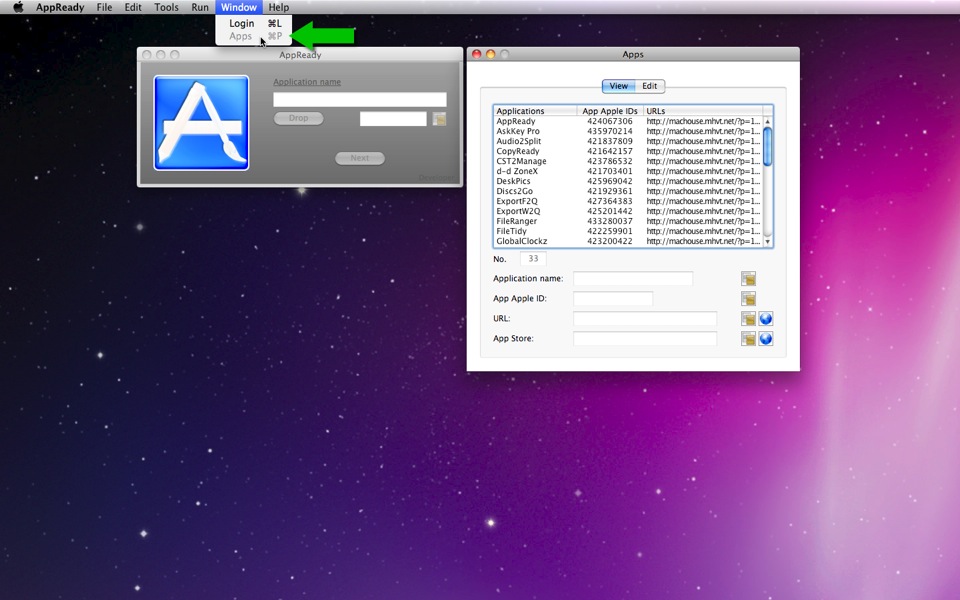
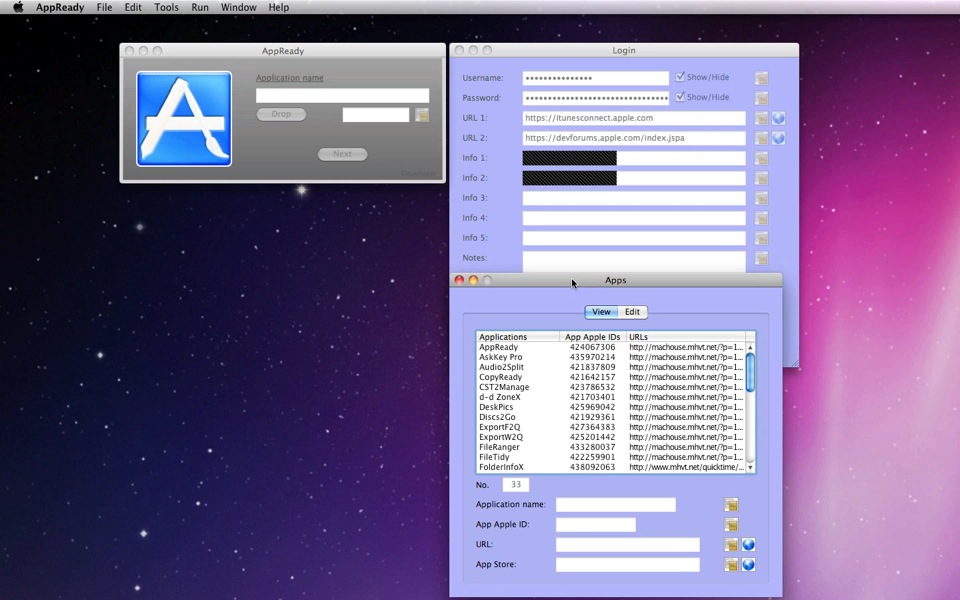
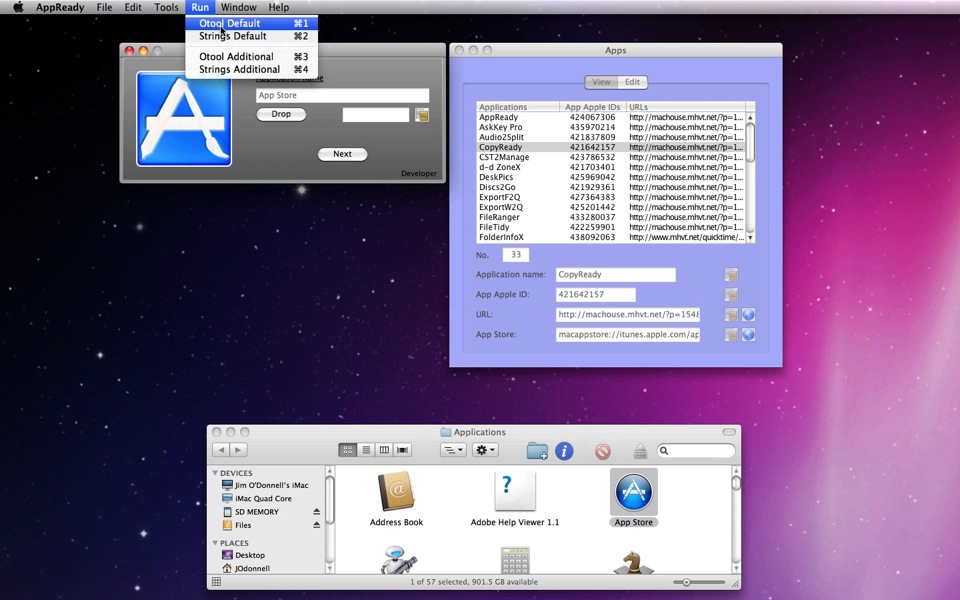
A totally new feature that is available with the introduction of Version 1.5 is called Apps. Apps allows the software developer to keep track of their software titles that have been submitted to Mac Apps Store. To start with, choose Apps under Window or press Command + P. (See Screenshot 3-1.) And a window similar to that of Login will open to the right. By default, in the presence of the Login window, the Apps window will appear right below the former.
As you see in Screenshot 3-1, Apps comes in two parts: View and Edit. Edit is there so that the user can enter software records with their titles, App Apple IDs (unique software identification numbers) and URLs at your web site. With App Apple IDs that you provide under Edit, AppReady can automatically generate Mac App Store URLs for your software titles under View. So let's first click on the Edit tab.
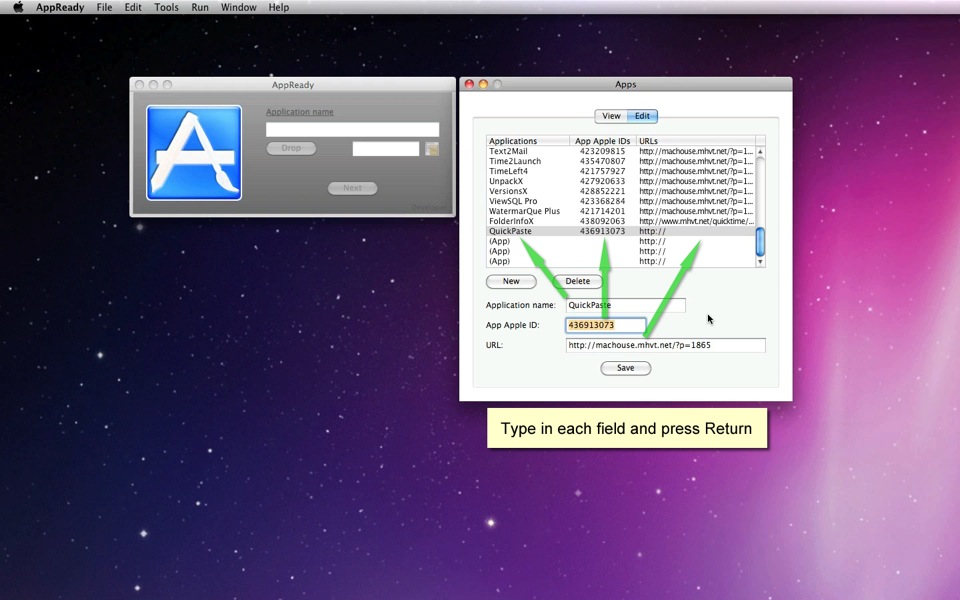
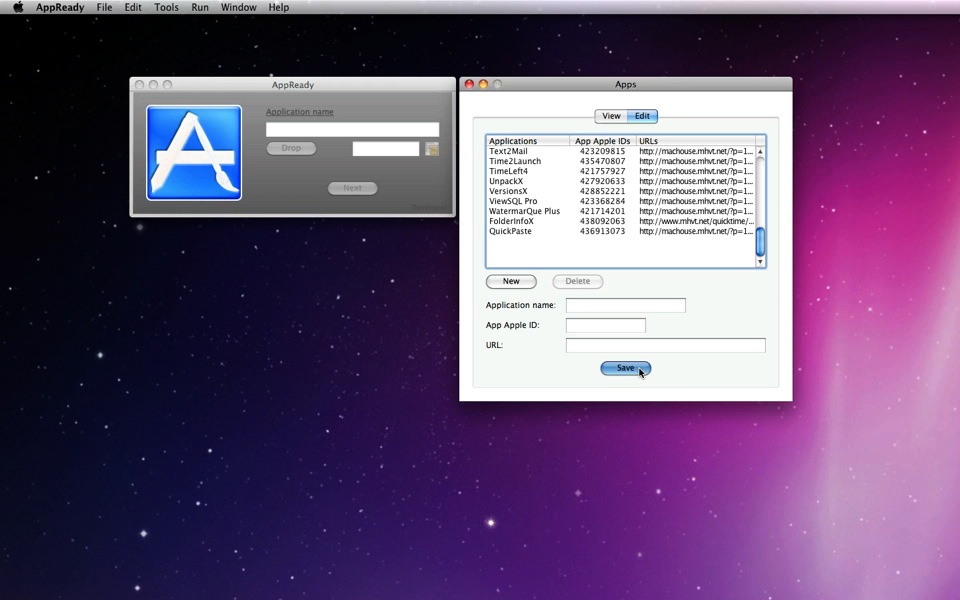
In order to enter a new software record, simply click on the New button. (See Screenshot 3-2.) If you have a number of software titles to record, it may be a good idea to press this button several times quickly. And every time you click on New, AppReady will insert a new row. The tab order is set such that, starting from the software listbox, it will switch to application title field, App Apple ID field and URL field. So if you keep pressing the tab key, the selected field will switch in that order. Now, just type a value in any of the fields and simply press Return. (See Screenshot 3-3.) And it will be inserted into the selected row in the software listbox. After finishing entering software records, make sure you press the Save button. (See Screenshot 3-4.)
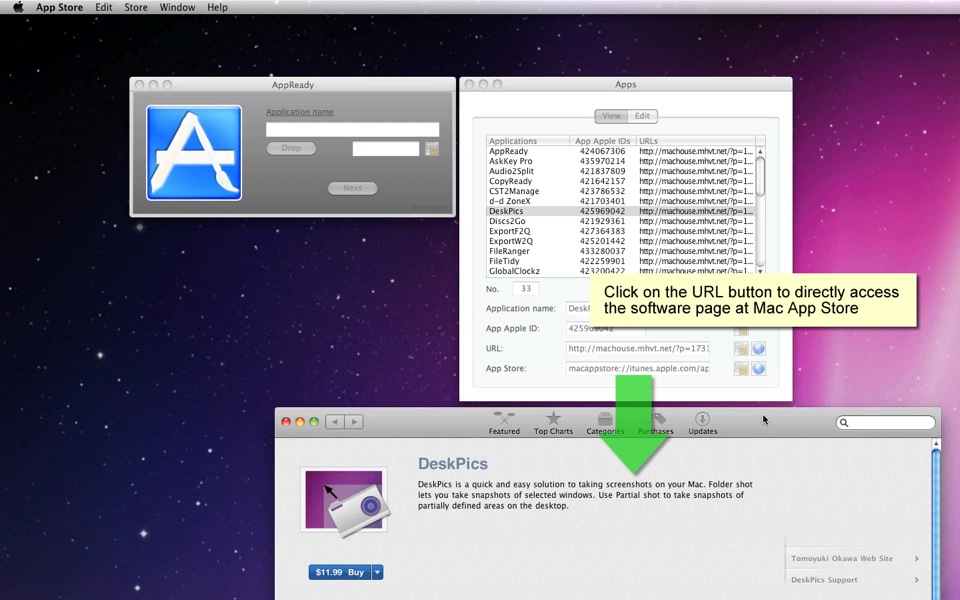
Now, going back to View, notice that there is an extra field that you don't see under Edit. With an App Apple ID that you provide under Edit, AppReady will automatically generate the Mac App Store URL for the selected software title that is inserted to the App Store field. (See Screenshot 3-5.) You can certainly use it as a hyperlink at your web site to redirect web site visitors to the description of the software title in question at Mac App Store. You can copy the Mac App Store URL by clicking on the copy button next to the App Store field. Also, click on the URL button to directly access the software description page at Mac App Store. (See Screenshots 3.6 & 3.7).
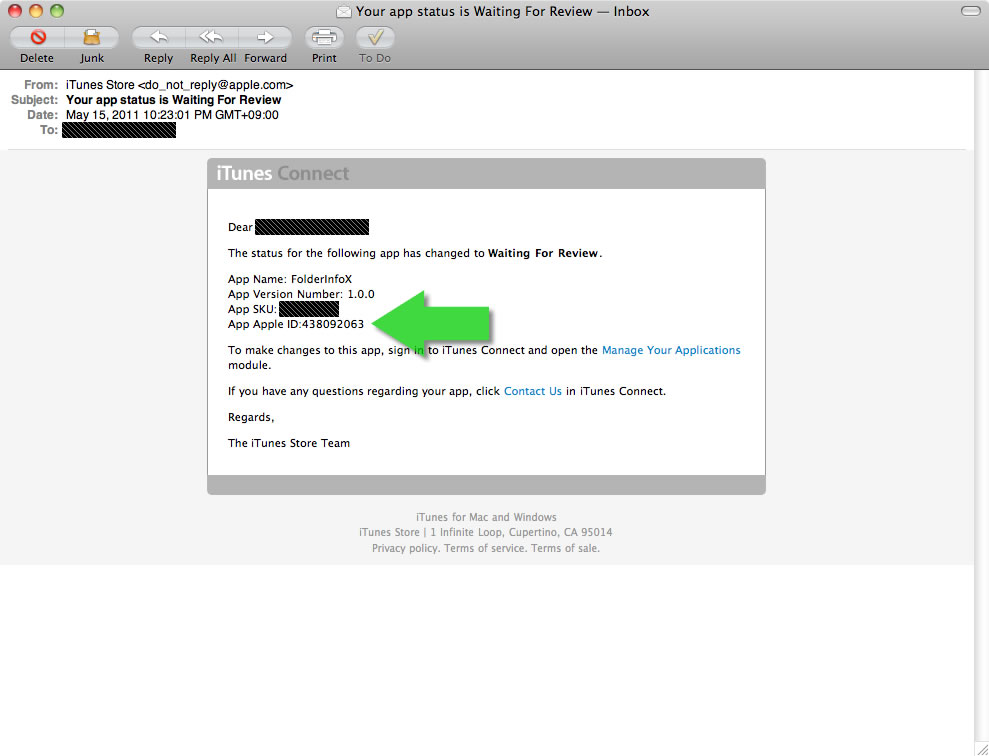
By the way, if you wonder what is the App Apple ID for a particular software title you've submitted to Mac App Store, an easy way of finding it is check your e-mail messages. Whenever you get ready and then actually submit a software title to iTunes Connect, you will receive a couple of messages for each submission. As you see in Screenshot 3-7a, these messages should mention the App Apple ID for the software title in question.
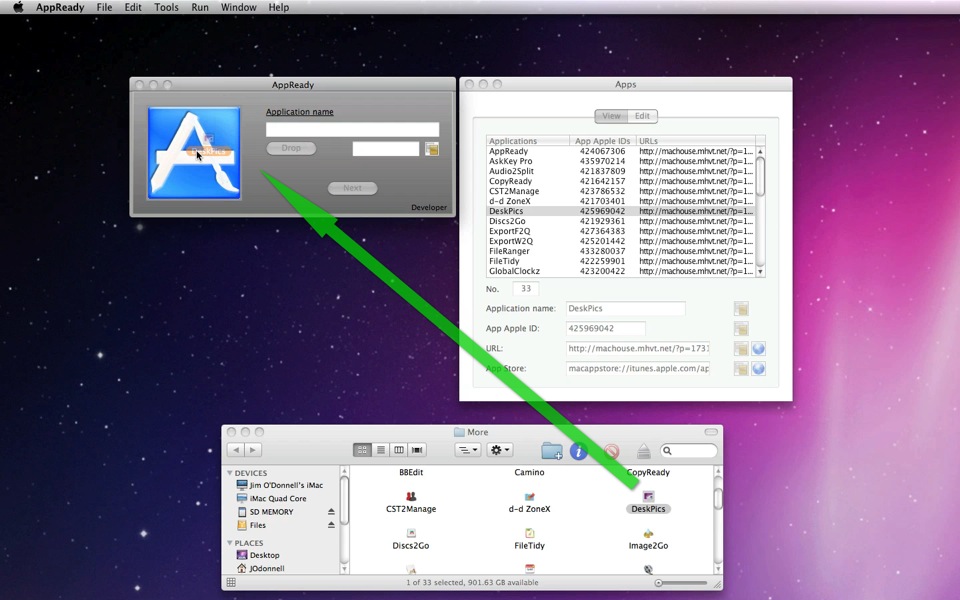
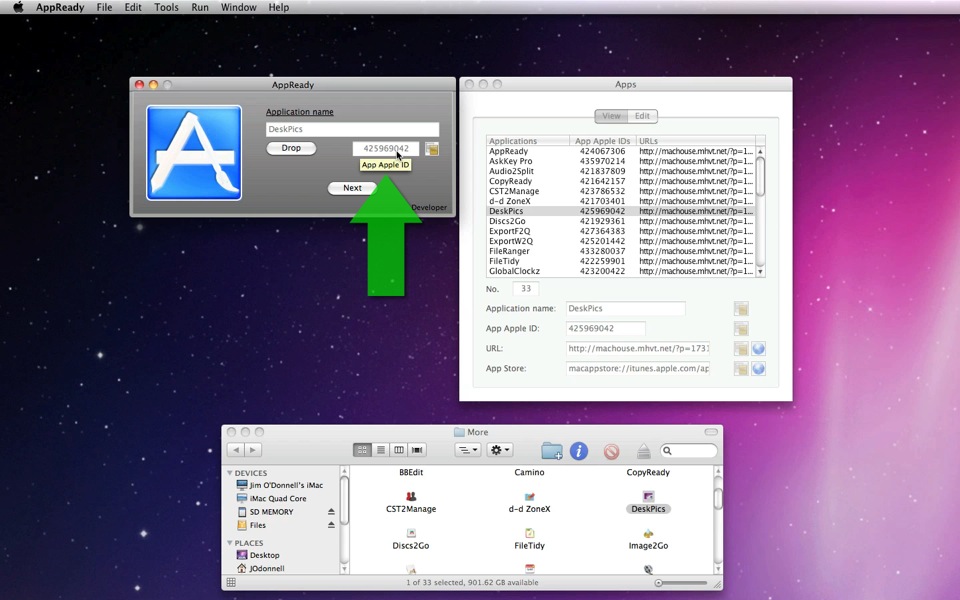
Next, let's go back to the main application window. And let's see what happens if you drag and drop an application icon onto the drop box. (See Screenshot 3-8.) You should be aware by now that there is a small edit field with a copy button, which were not available in previous versions. As you see in Screenshot 3-9, when you open an application that has been recorded in Apps, AppReady will automatically search its database and find application's App Apple ID, which will be inserted to the new edit field. You can copy this ID by clicking on the copy button. And press Command + P to paste it anywhere possibly as text. (See Screenshot 3-10.)
Just as you can export data under Login, you can also export software data under Apps. While the Apps window is selected, choose Export Apps under File. (See Screenshot 3-11.) When you select Export Apps, you will be prompted to select a destination folder. The file format must be txt, and the file name will appear as 'Apps' by default. (See Screenshot 3-12.) After pressing Save, AppReady will instantly generate a tab-separated text file as shown in Screenshot 3-13.
Moreover, let's go to Preferences. Under Settings1, you can change the window color of Login and Apps by first enabling Changing window color. (See Screenshot 3-14.) Click on the color button right below to select a color, and the color picker window will pop up. (See Screenshot 3-15.) In addition, you may want to enable Reorder Apps by name. By default, Apps' software records are ordered by creation date. More precisely, the order of appearance is merely determined by the way you saved software records last time. Unless you manually reorder them by dragging rows up and down, the order of appearance is the creation date. So, by enabling this checkbox, when Apps opens, AppReady will automatically sort software records by name.
Not surprisingly, with the Changing window color checkbox enabled, when you open Login and Apps, you will find out that these windows are colored accordingly. (See Screenshot 3-16.) For now, the Login and Apps windows cannot be colored differently.
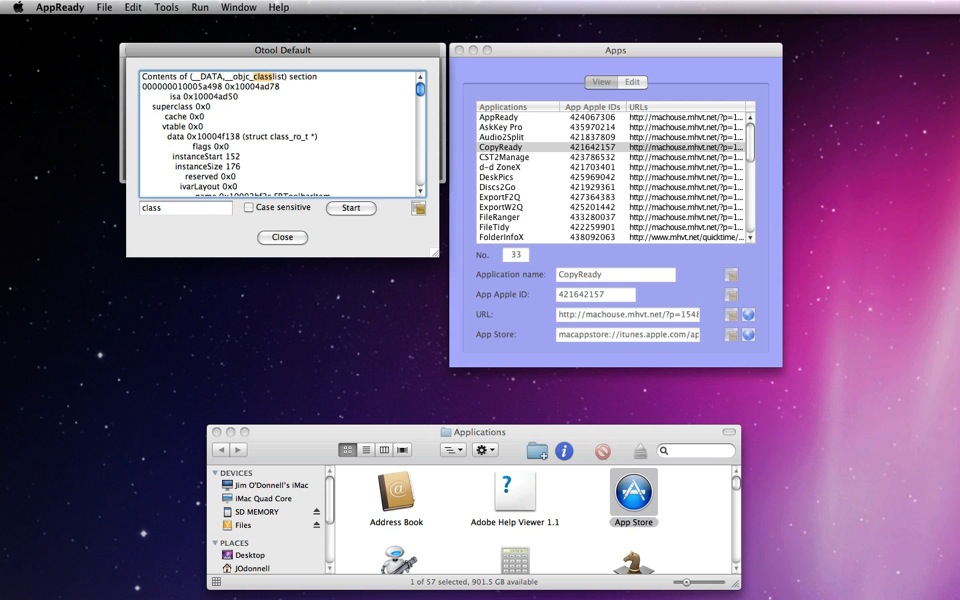
A major improvement is made over Otool Default, Strings Default, Otool Additional, Strings Additional under Run. These commands all allow the user to execute Otool and Strings on the main binary of the application or a selected file. As you see in Screenshot 3-18, there is an edit field available at the bottom of Otool Default's window. (The same improvement is made for other windows as well.) It's a search field. And enter a key phrase and press Return to run a search.
When there are multiple hits, you can switch from one match to next by pressing Return while the search field is selected. And every time AppReady finds a hit, a match will be highlighted in the top text area. (See Screenshot 3-19.) If you have reached the last match, you can go back to the first match by clicking on the Start button first and then press Return again while the search field is selected. Furthermore, enable Case senstive to run a case-sensitive search. (See Screenshot 3-20.)
|